I’m going to compile this and several other posts into a series I’m calling “How I Went from Knowing Nothing About Adobe Premiere and After Effects to Producing a Client Video in 2 Weeks.” How’s that for a short, catchy title? Since this effect was the last item I did in the video, I’m going to lead off with this one (and reorganize later!). If you prefer this as a video tutorial, just scroll down to the very bottom of the post.
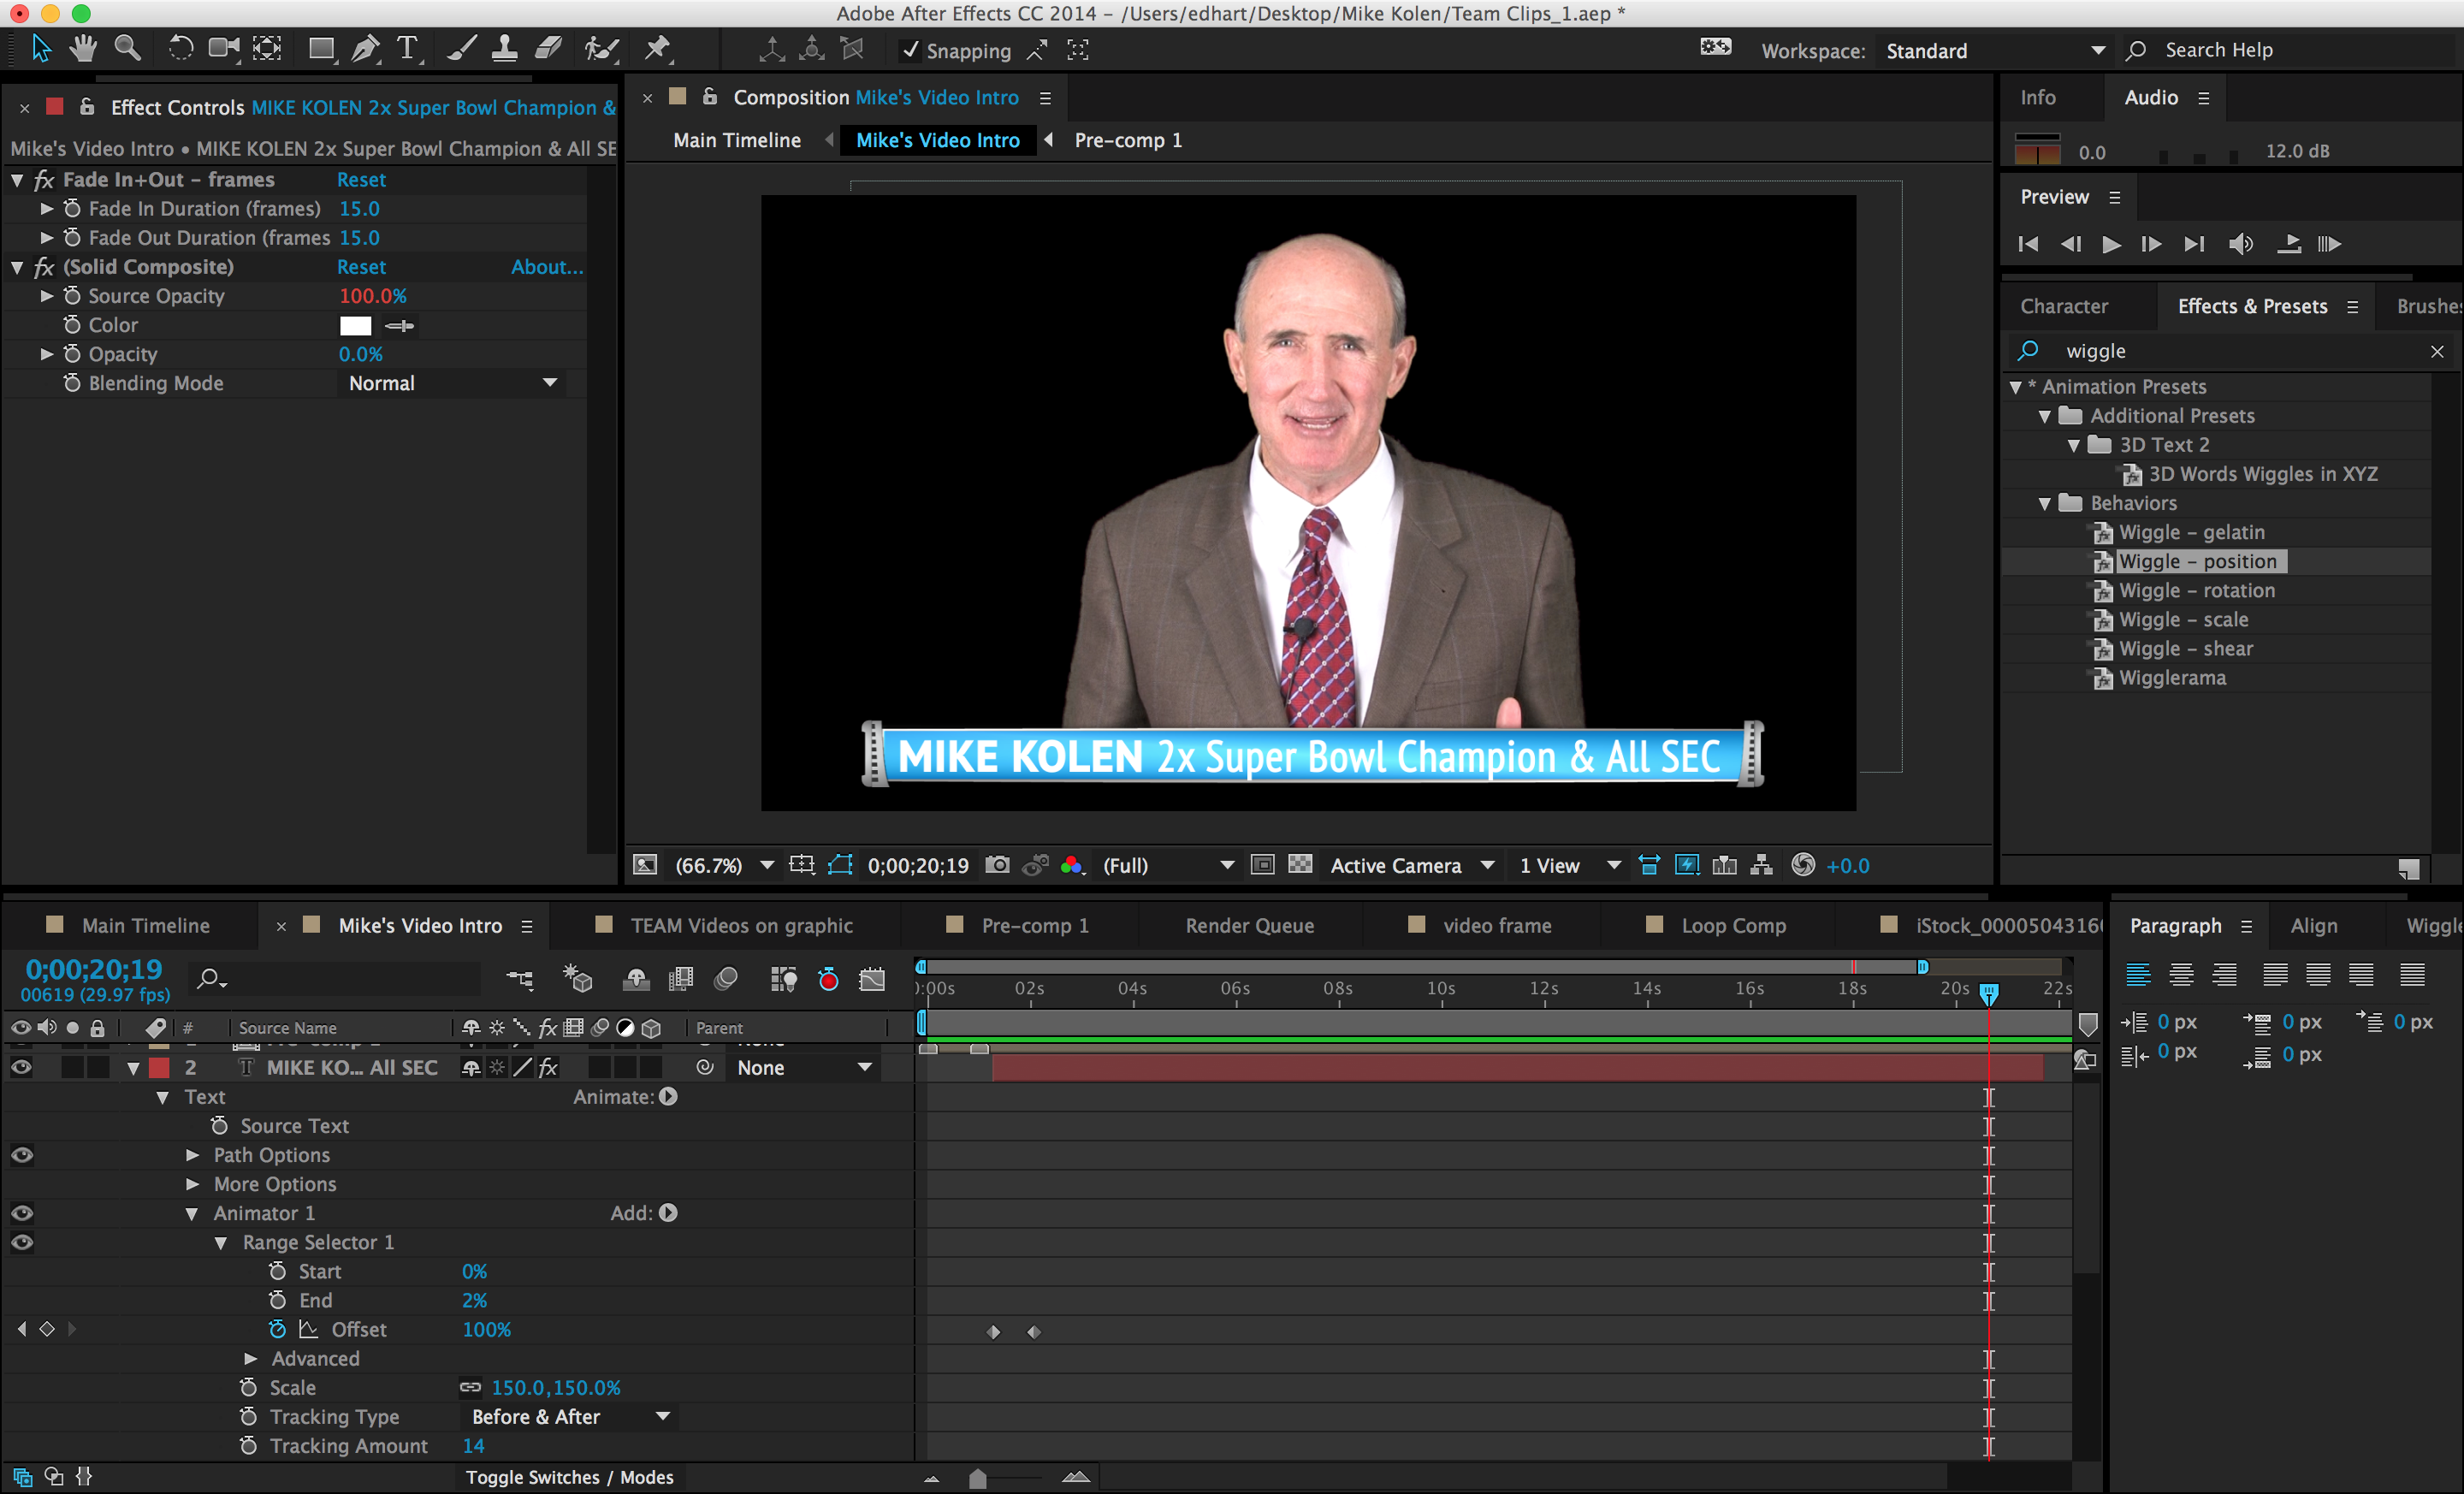
I wanted the beginning of the video to start with Mike’s talking head appearing over an animated bar similar to a sportscast on TV with a similar look to the graphic below, but not quite so sophisticated since I’m not the best artist around.
My idea was to have the graphic appear in the middle of the screen, flicker on with the music intro, and then open up with the bar in a scroll-like fashion. Once the intro is over, I wanted Mike’s head to fade out and then the bar to close back up.

So I took the basic elements of the bar graphic – the two anchors on each side and then the bar with the text – and created them as separate layers in Illustrator (see my other video on that) and then imported them into After Effects. Here’s my simplified version in it’s own composition (with the KeyLight preset already applied:

I actually used a composition within a composition for this and I’ll explain why…
I also wanted to add a little life to the bar while it was open using a light sweep, but I wanted the light sweep to just effect the bar itself that the text was on, not the anchor graphics on each side. So once I imported each of the layers into After Effects, I “pre-composed” the two anchors and also the little placeholder graphic and animated the position of the two anchors and the opacity of the placeholder.
In the original composition, I left the bar, the video footage and the text. I animated the bar’s scale parameters to match it up with the anchors (which took a little fiddling with in the keyframe editor) and then applied the CC Light Sweep preset to the bar graphic and the Text Sequence – Magnify preset to the text, adjusting the offset value until I got the look that I wanted.
I suppose I could have done all this in one composition, but it helped me to break the animation into “bit sized” chunks and work with the different parts pieces separately. Had I tried to do this in Motion, I could have turned on the record button and moved everything around on the canvas, changing parameters and values with the mouse and done it all at one time. But once I started to get the hang of how this works in After Effects, it really wasn’t that hard or time consuming. It’s just a different way of looking at things. All that to say, once I understood how to change parameters, creating this effect took me about 15 minutes.
Once I got the pieces of the graphic animated the way I wanted, the next step was to add the flicker effect as the graphic appeared and later disappeared, mimicking graphics that I’ve seen from time to time on ESPN. I think there are different ways to do this, so I’ll mention the method I used, and then a potential other method that I haven’t tried yet, but looks like it’d do the trick (maybe even a little better) as well as address my looping question for the video frame (in this other section). Both of these methods used expressions tied to the Opacity parameter, which prior to this project, I didn’t have a clue even existed and which I’m still not sure I totally understand! I’d love to get some comments about how to do this easier or if there are any presets that will give the result that I just don’t know about.
I found my first solution on the Creative Cow forum here. Reading through the whole thread (it’s not long) was helpful in deconstructing the expression and understanding what’s going on. Here’s the final expression that I used:
// Start if ((time >1) && (time<22.1)) { 100 } else { r=random(1); if (r<.5) 0 else 100 } //EOSBasically, what this is saying is if the time on the timeline is between 1 second and 22.1 “seconds” (see the thread for a little explanation of the decimal here) then the Opacity parameter should equal 100%, but before that and after that the parameter will be set to a random number for each frame and if that random number is less than 0.5 then the Opacity will be set to 0 and if 0.5 or greater, then the Opacity parameter will be set to 100. This creates the flicker during the first 1 second and the last 1 second of my composition. That’s based on my specific composition for Mike’s intro.
Once I set the Opacity flicker expression and had all the elements animated as described above, then I could stick the entire composition into the main composition that made up the bulk of the video.
One thing I love about After Effects is the whole composition thing. I totally didn’t understand it at first, but once I started to get my head around it, it’s so helpful to create a composition for a specific effect, then use that in another composition so you can further animate or modify the composition as a whole. Here’s a video tutorial with the opening sequence of my project as well as a full walkthrough of how I created the animations and effects:
Interestingly enough, after I finished the project, I was reading about expressions (trying to understand them a little better) and ran across this great script referenced from the Adobe help section that helps to explain 2 different effects that I was trying to incorporate into this video – looping animations and the flicker on effect. Watching the video was really helpful and I’ll probably buy the script for the next project as the easy shortcut way to get an expression. I’d love to have the time to really learn them!
One reply on “Creating a “Flicker On” Effect in After Effects”
I try to import each of the layers into After Effects, I “pre-composed” between the two objects.